How to Grow Cannabis Outdoors: Featured Guide from Homegrown Cannabis Co.
Growing cannabis outdoors is a seven-month adventure, and one of the most rewarding things a home grower can do. You're working with the sun, the soil, and the seasons — and the result, if you do it right, is something no dispensary shelf can match: potent, terpene-rich, sun-grown flowers that you raised yourself from seed.
This guide covers everything from choosing your seeds and preparing your soil to harvesting before first light and curing for peak flavor. It's built on the sustainable, regenerative approach practiced by Nikki and Swami at Ganja Ma Farm in California's Emerald Triangle — growers who have been doing this for decades.
Why Grow Outdoors?
The case for outdoor growing starts with quality. When you grow your own, you know there are no pesticides, you control everything that goes into the soil, and the plants develop under natural sunlight — which has a profound effect on the finished bud that any seasoned cannabis grower will recognize.
There's also the environmental argument. Outdoor growing doesn't require powerful lights running 18 hours a day, expensive cooling systems, or significant energy consumption. You can produce your own compost teas, amend your own organic soil, and grow in a way that actually gives back to the land.
And then there's cost. Most Americans are paying $35–$50 for an eighth with limited strain choice and no transparency about how it was grown. Learning to grow your own changes that equation entirely.
Is Outdoor Growing Right for You?
The ideal outdoor climate is Mediterranean: hot summers, mild falls, and very little rain. Most cannabis strains thrive in these conditions, especially longer-flowering sativas. If you live somewhere with shorter summers or cooler temperatures, focus on indica-dominant or fast-flowering varieties. Autoflowering strains are particularly well-suited to short seasons, completing their entire cycle in around 10–12 weeks regardless of light hours.
Space is less of a barrier than most people think. A small balcony with room for a potted plant is enough to get started. That said, even a few container plants need regular attention — watering, feeding, pruning, and pest monitoring are all part of the job.
Before anything else, check your local laws. Most states that allow home cultivation require plants to be out of public sight and secured behind a locked gate or fence.
Choosing Your Seeds
Seed selection is where the outdoor season begins — usually during the long winter months when you're planning next year's grow. The key decisions are climate suitability, flowering time, and seed type.
For northern US growers with shorter summers, indica or indica-dominant hybrids with fast flowering times are the safest bet. The further north you are, the more important it is to choose a strain that finishes before the cold arrives. Autoflowers remove the guesswork entirely.
For growers in warmer, sunnier climates with long seasons, the options open up considerably — you can grow almost anything, including long-flowering sativas, and stagger your harvest across multiple cultivars to maximize drying room space.
Think about humidity and rainfall too. In wet climates, strains with natural mold resistance are worth prioritizing. Sativas often handle humidity better than indicas, thanks to their smaller, better-ventilated bud structure.
Beyond the practical considerations, it comes down to personal taste: flavor, aroma, effect, THC range, CBD content. Take your time with this decision — it sets the tone for the whole season.
Choosing Your Location
Location is everything. The sunniest spot in your garden is the starting point — and bear in mind that the sun sits lower in spring and fall than it does in midsummer, so account for shadows accordingly. Phone apps designed for solar panel placement can help you map this accurately.
The spot also needs to be accessible every day, since outdoor growing requires daily attention during the season. A light breeze helps with airflow and plant health, but high winds are damaging — if your sunniest spot is also your windiest, build a natural windbreak with large shrubs or a fence.
If planting directly into the ground, check the soil quality and make sure you can amend or replace it if needed. Wherever you choose, make sure pests are accounted for — both insects and larger animals like deer, rabbits, and gophers. Secure the perimeter appropriately and keep the grow area clean and tidy.
Preparing Your Soil
Healthy soil is the foundation of everything. Building genuine soil fertility takes years — three to four seasons of consistent organic management — so the best approach is to work with what you have and improve it steadily rather than starting fresh each year.
If using existing ground soil, have it tested before you start. You'll want pH between 6.0 and 7.0. Depending on the results, you may need to bring in amendments or entirely new growing medium.
For organic soil building, good inputs include chicken manure, worm castings, compost, alfalfa meal, sea kelp, rock phosphate, green sand, gypsum, and wood chips. The goal is not just to feed the plant but to feed the soil — to create a living, microbially active medium that naturally processes nutrients and makes them available to the roots.
Avoid bat guano and seabird guano, which involve environmentally damaging harvesting practices. Skip peat moss, which takes centuries to regenerate once removed. And avoid harsh synthetic fertilizers, which leave salt deposits in the soil over time that block nutrient uptake and degrade long-term fertility.
Cannabis is a bio-accumulator — it draws up everything in the soil, good or bad. Feed it well with clean, organic inputs and the quality of the finished bud reflects it.
Germination
In late March or early April, as spring arrives, it's time to start seeds. The approach used at Ganja Ma Farm is to soak seeds in small labeled jars of water, covered with a pale towel to mimic the darkness of being a half-inch underground. After 24–48 hours, most seeds crack their shells and produce a small taproot.
Once the taproot appears, transfer seeds into small pots of pre-moistened sprouting soil. Poke a half-inch hole, add a small amount of mycorrhizae (a fungal root stimulant), place the seed with the white root pointing down, and cover gently. Water with a mister to avoid disturbing the soil.
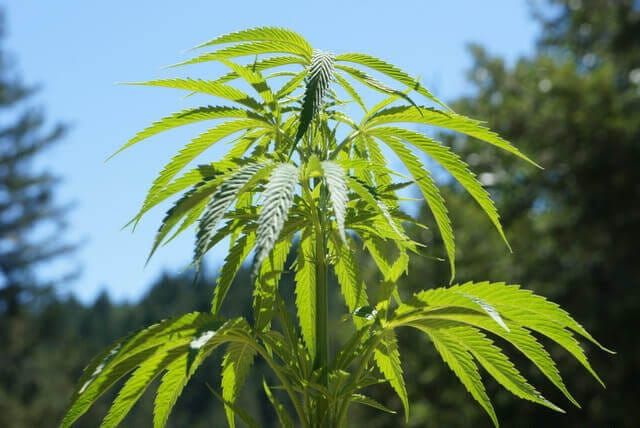
Take seedlings outside promptly so they begin adapting to outdoor conditions from the start. Coddling them indoors too long makes them less resilient. Within a week or so the first rounded cotyledon leaves appear, then the first set of serrated cannabis leaves, then successive sets at 90° intervals as the plant builds its branching structure. About ten days after the first transplant, a small application of chicken manure watered in gives seedlings a noticeable boost.
Protecting Young Plants
In late April or May, late frost is still possible in many regions. Protect seedlings with low tunnel cloches made from PVC pipe hoops and greenhouse plastic, or frost cloth draped over tomato cages. These simple structures keep plants warm during cold snaps and can be removed quickly when the weather improves.
If rain arrives later in the season, stop watering for a day or two before and after the storm to prevent waterlogging — as long as drainage is good, established plants handle rain fine. Trichomes are not water-soluble, so a wet spell won't wash away potency.
Feeding and Watering
Establish a regular watering and feeding routine and stick to it. Plants that experience inconsistent feeding and watering don't grow as well — they become uncertain about their next meal and respond accordingly.
The most effective feeding method for organic outdoor grows is aerobic compost tea — brewed in a five-gallon bucket with an aquarium air bubbler and quality compost ingredients, then used as a soil drench every seven to ten days. Different tea formulas suit different growth stages: some optimized for vegetative growth, others for flowering. Use what resources you have in your garden and neighborhood and ask your local nursery for guidance.
Before applying powdered amendments, water the plant first, then apply the powder and water it in again. Never apply dry amendments to dry soil.
Avoid commercial salt-based fertilizers as a long-term strategy. While they work short-term, the salt residue builds up in the soil over seasons and progressively blocks the plant's ability to absorb nutrients.
July and August are the peak vegetative growth months — the long days and intense sun drive rapid development. This is when consistent watering and feeding matters most.
Sexing Your Plants
If growing from regular seeds, identifying plant gender is an essential skill. Once plants reach seven or more nodes and around two feet in height — usually late May to early June — inspect the top nodes closely each day.
Female plants show two small, pale-green, hair-like pistils emerging from the node junctions. Male plants produce small yellow-green pollen sacs that eventually dangle and burst open. Once pollen is released, all females in the garden can be fertilized, which will seed the buds and significantly reduce their quality. Remove males as soon as they're identified, before the sacs break.
If growing feminized seeds, this step is eliminated entirely — all plants will be female, which is why fems are the recommended choice for most home growers.
Cannabis plants can also change sex under stress — females may produce male branches if they detect no pollen source nearby. Monitor throughout the flowering period and remove any male growth immediately.
Final Transplant and Trellising
By end of June or early July, confirmed female plants are ready for their final home. Whether going into prepared ground mounds or large containers, handle the root ball carefully during transplanting — water the pot first so damp soil holds together, then gently loosen any root-bound growth before placing.
A healthy, well-fed outdoor plant can reach six feet in diameter and significant height, so give plants adequate space and plan support structures early. Bamboo poles — four verticals around each plant with horizontal crossbars attached at two-to-three-foot intervals using zip ties — provide effective support as branches get heavier through flowering. Add horizontal tiers as the plant grows. Trellising continues into September as bud weight increases, and becomes especially important before any late-season rain that could make the tops dangerously heavy.
Monitoring for Pests and Disease
July and August require close attention to pests and pathogens. Watch for gophers, ground squirrels, deer, and field mice at ground level, and inspect plants regularly for aphids, russet mites, and thrips. Releasing ladybugs in the early evening is a natural and effective pest control measure — they feed on many common cannabis pests without any chemical intervention.
In late September and October, mold and powdery mildew become the primary concern, especially in regions with fall rain and morning fog. For powdery mildew, a diluted hydrogen peroxide spray — applied particularly to the undersides of leaves — can help. Diluted skim milk or pomegranate juice are other options that alter leaf pH to inhibit mildew growth. Whatever you use, monitor closely for adverse reactions.
Avoid pesticides throughout. Cannabis is a bio-accumulator and anything sprayed on the plant ends up in the finished product.
Flowering
In most regions, flowering begins in the first week of August when darkness exceeds nine and a half hours per night. At this point all males must be out of the garden entirely. Continue monitoring for any female plants that produce male branches — remove these immediately before pollen can spread.
Keep feeding and watering consistently through flowering. The nutrient focus shifts from nitrogen-heavy (for vegetative growth) to phosphorus and potassium-rich inputs that support bud development and density.
Preparing the Drying Room
By September, the drying space needs to be ready. Choose a dedicated room with no pet access, good ventilation, and the ability to control both airflow and humidity. Cover all windows with black plastic. String galvanized wire or strong cord at just above head height across the room for hanging branches. A dehumidifier may be needed in wet climates; in dry regions it often isn't necessary.
The ideal drying environment is 60°F and 60% humidity with consistent airflow. Branches are ready to come down when the smaller stems snap cleanly rather than bending.
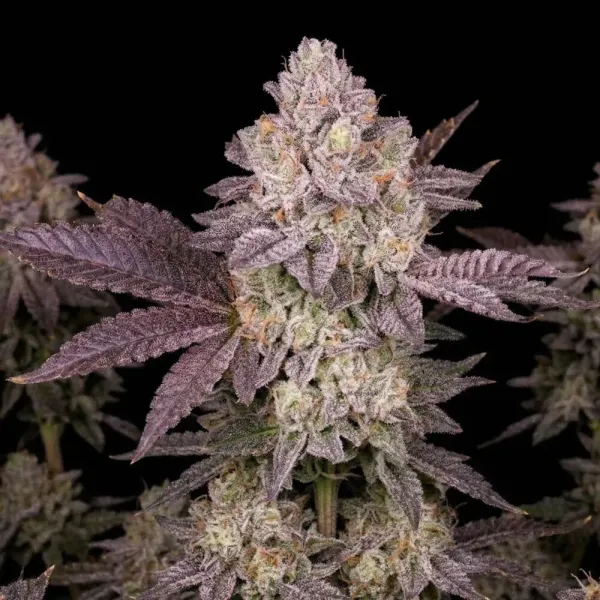
Harvesting
The decision of when to harvest is the most critical judgment call of the season. Two key visual indicators help: the pistils (hairs on the buds) and the trichomes. When the lower bud pistils turn brown, shriveled, and almost burnt-looking, harvest is approaching. Confirm with a 60x or 120x magnifying glass — when roughly a quarter to a third of trichomes have turned amber, the window is open. There's typically a three-to-four-day peak.
Harvest too early and THC hasn't fully developed. Harvest too late and THC begins degrading into CBN.
The optimal time to cut is just before first light — not sunrise, but the darkness before dawn. Terpenes and cannabinoids are at their peak concentration at this time of day and off-gas progressively through daylight hours.
Cut whole branches close to the stalk, remove large fan leaves and any yellow or brown leaves, and hang immediately in the drying room upside down. Leave some smaller leaves on the buds — they protect the delicate trichomes through the drying and curing process.
Drying and Curing
Drying takes ten days to two weeks. When small stems snap rather than bend, the branches are ready for bucking and storage. Place bucked branches in clean cardboard boxes or plastic tubs lined with brown kraft paper, which helps equalize moisture across the batch.
The flowers still need curing before they reach their peak. Store in a cool, dark place and "burp" the containers every other day — open them briefly to release accumulated moisture. Glass jars are ideal for long-term storage; kept airtight in a cool, dark location, properly cured cannabis holds its peak quality for a year or more.
For those willing to wait, aged cannabis — cured and stored for eight or nine months after harvest — develops a smoothness and depth that freshly dried flowers simply don't have.
The Bottom Line
A successful outdoor grow takes seven months of attention, starting long before the first seed goes in the ground. Get the fundamentals right — strain selection, soil health, location, and consistent feeding — and the sun does most of the heavy lifting. The result is something that cannot be replicated indoors: organic, sun-grown cannabis that you produced yourself from seed to harvest.
This guide was produced in partnership with Homegrown Cannabis Co. Explore their full range of outdoor-suited seeds at homegrowncannabis.com